A Conclusion to the Nursery Glider Saga


So, we bought a new glider chair for little girl's nursery. If you've been following along, you'll know that this chair and it's potential existence has been quite the saga. The issue was basically whether or not to use HDawg's glider or buy a new one for June. When I first mentioned our dilemma here, most of you suggested that we pass on the glider from H to LLJ and get him a loveseat or big chair of some sort.

You guys are the bomb diggity, so of course we took your advice and planned to do exactly that. It seemed like the perfect idea since we plan to use H's large room as a combination bedroom for him/playroom for both kids. A big ol' sofa sounded great in there and then the comfy PB glider could reside in LLJ's nursery. So that was the plan. I shared some pics of the nursery's new rocking nook where I used our old Eames rocker as a placeholder for H's glider. Once LLJ was born, we moved H's glider into her nursery, putting the plan into action. Ummm, it didn't fit. Seriously. The big ol' chair was... well, too big for her tiny room. We left it in there for a few days and could barely function or move around the room because the chair was so big. Crap.

Picture this- I'm a few days home from the hospital, exhausted, hormonal and nursing my new baby at all hours of the night in that terrible plastic Eames chair. Mhm, it was time to get momma a new comfy chair. Which sort of worked out because we learned really quickly that we (and HDawg) really missed having his big glider chair in his room. I'm not sure that we would have found an inexpensive sofa that we liked as much for his space. So, David and I finally sucked it up and realized the reality that we needed to buy two gliders.

After many late night nursing shopping sessions (those are dangerous, right?!), I decided on this glider from Babies "R" Us. Since the ultimate restriction was that we needed an inexpensive piece, we went back and forth between a simple wooden nursery glider and something upholstered. Upholstered was the preferred option, but we had to find a deal. Finally, we struck gold at Babies "R" Us of all places. I didn't plan to choose a dark gray rocker, but this chair was a really good deal (we got about $125 off of the sticker price with a sale and a coupon so the chair rang in just under $300) and we feel like it's slightly modern shape and versatile color will easily fit into another room down the road. I think it would be really pretty in our master bedroom one day, perhaps?

Long story short, we are now the proud owners of two nursery gliders. We tried to avoid spending big money on two "baby" pieces by planning to purchase more versatile/non-baby pieces like the sofa for H's room, but that's life! Especially with two kids under two.

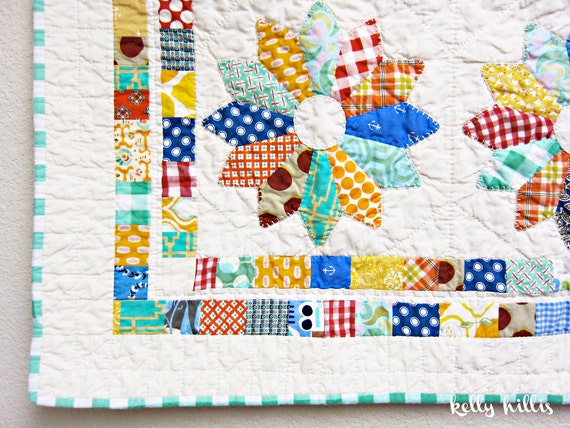
In the end, we love this glider in Little June's nursery. It has a much smaller profile than H's big fat Pottery Barn glider so it fits the room well. It's also really comfortable! I plan on doing a full reveal of her nursery next week (finally!) so you'll have to wait until then to see the chair all decked out in the nursery.

Okay fine, you twisted by arm. Because I love y'all, here's a sneak peek of the new chair in the room.


Ohhh yeah, I love it!

Cajun Shrimp Cobb Salad Recipe


Over the past couple of weeks, I've finally gotten back in the kitchen and started whipping up fun recipes. For awhile there at the end of my pregnancy, we were limited to frozen meals and take out! But like I shared in my postnatal nesting confessions, I've had the itch to cook again.

This fabulous salad stems from a recipe I saw on Pinterest, coupled with a few Michelle additions. It's not the most healthy of salads, but it certainly is a good one. I posted a photo on my Instagram account earlier this week and you guys asked to share the recipe... so here you go. Enjoy!

Ingredients

-1 lb. shrimp
-Cajun seasoning
-olive oil
-mixed greens
-can of corn
-onion
-tomatoes
-avocados
 -2 hard boiled eggs
-bacon
-Ranch dressing

(I'm not more specific on the quantity of some of the veggies because you should add them in the amounts you like, to taste! To serve David, HDawg and I, I think I used 6-8 small slices of bacon, 1/4 onion, 2 tomatoes and 2 avocados.)

Directions

Defrost, devein and peel your shrimp. Spread on a baking sheet and cover in olive oil and Cajun seasoning, to taste. Bake at 400 degrees for about five minutes.

Meanwhile, boil the eggs and cook the bacon. I used the cheat bacon that is already cooked and simply needs to be heated in the microwave. Then chop all of the veggies and spread over your salad mixture. Serve with a small drizzling of Ranch dressing and salt and pepper.

Just a note, we generally eat dairy-free in our house for H, but a delicious addition to this salad would be some crumbled blue cheese.

Bon appetit!


DIY Nursery LOVE Art


Let's face it. I'm a girl who loves me some DIY wall art. Remember my scrapbook Modge Podge city skyline art? My rustic pallet quote sign? The Instagram photo display I created? My painters tape abstract art? Or my nail head trim art? Yeah, the list could go on and on and on.

Needless to say, when it came to decorating Little Lady June's walls, it didn't take me long to work up some do-it-yourself projects. One of my favs that I made is this DIY nursery "love" art.

Supplies: canvas, scrapbook or wrapping paper, scissors, glue and a gold marker.


From the beginning, I knew that this project needed to be a little glam. As you know, Little June's nursery (which I need to snap final pics of and share with you!) is pink and gold, so I had to add some Liberace flare to this piece. I simply used a gold Sharpie marker to color the edges of the canvas.


Next, I cut out the letters for L-O-V-E from some pretty wrapping paper I picked up at World Market years ago and then glued them onto the canvas. I wanted the letters to be large and close together, for sort of a modern look.


I was really happy with the result, but thought the piece needed a little more pizazz.


I first added a few gold dot stickers, but eventually decided that wasn't my favorite option.


Instead, I decided to add a few pretty gold sparkling hearts. I used a heart-shaped cookie cutter to trace hearts on some gold glitter scrap book paper.


Then I glued each heart to a piece of clear fishing wire and draped the wire across the art.


I pretty much love the end result of this super simple DIY.


And hopefully LLJ will love it, too!

The Friday Jot List

Uh, the Saturday jot list?

Oops. This post was supposed to go up yesterday, but I had both kiddos home all day by myself for the first time. We had a ball and everyone survived, but the blogging most certainly did not get done!

So even though it's a little late, here's what's on my mind this lovely spring weekend.

1. Bloom workshop. 

My sweet blog friend turned real life friend, Michaela, just announced that she is hosting an amazing workshop this summer: Bloom. The workshop, which focuses on blogging, business, photography and design (um, lots of my favorite things!) will be in Grand Rapids, Michigan this June. You can check out more about the event right here. I so wish I could go! But I do plan to be at the Haven Conference here in Atlanta this summer... are any of you planning on attending?!

2. Spring fashion.

I just picked up some fun new things for the fam at Gap. I snagged 40% off at the Friends and Family sale last week, but right now, they've got 35% off regular priced styles with the code word STYLE. Not too shabby.

For the kiddos, I picked up these shoes for HDawg and this bathing suit for LLJ. I definitely plan to get her some sort of ridiculously ruffled bikini, but this will be a nice, practical option for her : )


David picked up a few soft V-neck tees and this cute button up shirt.


For myself, I ordered this dress, which appears to be out of stock. Hopefully it will be a good every day dress to get me through spring! I also picked up these classic Chucks from Nordstrom to get me through those pre-flip flop warm days.


I think my little fam will be styling and ready for warmer weather!

3. Tuesdays at Ten June. Submit your favorite projects to me this weekend to be featured next week!

4. Monthly Clean Home Challenge. 

 Has anyone been following along with Jen's Monthly Clean Home Challenge? She added an extra task to her cleaning list for the month of March to help beef up her cleaning routine. Sort of an extra spring cleaning boost, if you will. And I am so inspired! 

Right now, I'm trying to dig back into my weekly cleaning schedule that I created at the beginning of the year (as much as my three week old will let me!) but I plan to take Jen's challenge sometime soon. If I can get my act together, maybe in April? Okay, May. Maybe June. If you're lucky.

5. Smoothies. 

Believe it or not, we have been without a blender for about a year. Ours broke months and months ago and for some reason, we just never replaced it until recently. I know, weird, right? It's amazing what a simple $40 kitchen appliance will do for ya. Anyways, David, HDawg and I are officially obsessed with smoothies now that we have a blender in the house again. It's our go-to snack these days. If you follow me on Pinterest, you'll see that I've been pinning some smoothie recipes onto my Food + Recipes board. Got any other good ones I should add?!

Have a great weekend, friends!

A Pretty Pink DIY Spring Wreath

In light of my postnatal nesting phase, I am thrilled to shake off winter and to welcome the beautiful spring that is hopefully ahead of us. There's something about spring that feels like a fresh start.

With that said, I'm excited to bring some pretty spring touches into my home. Let's start with the front door, shall we? Check out my pretty pink spring wreath.


As part of National Craft Month, I teamed up with Jo-Ann Fabric and Craft Stores to create this floral spring craft. To show their love for all things crafty, Jo-Ann not only has an awesome spring craft inspiration website available right now, but they've also got a $5 off of $25 purchase coupon available for you right here!

This DIY project was super simple, friends. I picked up a plain grapevine wreath and some pretty faux blooms at Jo-Ann.


All I did was simply snip the faux florals and greens from their stems and piece into the wreath form. No gluing, no sewing. Just shove 'em in and voila! I've got a pretty pink spring wreath. Hey, that's a pretty good DIY project when you've got a two week old baby on your arm ; )


Speaking of adorable baby girls, Little Lady June has totally inspired me to think pink these days. I'll bet you see a lot more of this color popping up in my house this spring and summer!

What are you crafting up for spring?

Yo! Just a heads up, I was provided with the products mentioned in this post as part of the Jo-Ann Fabric and Craft Stores National Craft Month campaign, but all opinions and thoughts are from yours truly.

Tuesdays at Ten June

It's Tuesday, friends! I apologize that this post is going up a little late today... I got sidetracked by an adorable two week old little girl who is in the middle of her first growth spurt and wants to nurse all day, errr day. Oh, and I was embarrassingly distracted by a marathon of Naked and Afraid... that show is just so ridiculous, I can't. stop. watching. 

Anyways! Your projects. Check 'em out!

I'm totally obsessed with this rustic meets high-tech DIY log iPad stand by Jessie at Imperfectly Polished.


How pretty is this pink spring mantel by Aimlessly Elegant complete with a fun DIY mirror?


I've always wanted to frame this vintage scarf I have that was passed down to me from my great-grandmother- I think it would be so pretty on the wall. Deme from House for Five is totally on the same page and framed up two scarves for her living room. I love them!


Speaking of pretty wall art, check out the awesome gallery wall from my sweet friend Natasha with Schue Love. I love all of the beautiful photographs of her sweet boy, Ethan.


That's it for this week. Thanks again to all of you who sent in submissions. Keep 'em coming!

DIY Wood + Felt Shape Matching Toy


HDawg is getting to the age where he loves to match and identify matching pairs. He's got a picture book with pop out puzzle pieces and one of his favorite things to do is to match the photo of the duck with the duck piece or the shoe photo and the shoe piece. 

A few weeks ago, I saw these cute wooden chips on sale at my local craft store and the wheels started turning in my little brain. I could make H his own fun, portable matching game!

All you need for this craft are wooden craft circles, felt, scissors, craft paint, paint brushes and glue. I have fabric glue shown here, but I actually used regular clear Elmer's craft glue, since it's safer just in case the chips go in the kiddos' mouths.


This is a really fun and easy craft. You could easily get your older kids involved, too!

Start off by painting the wooden circles. I decided to use this fun aqua craft paint (which is non-toxic, FYI) to paint the back, sides and a small part of the front of my circles.


While the circles dry, cut out your felt shapes. I chose six classic shapes, including a heart, triangle, circle, square, rectangle and star, in bright, fun colors.


Now simply glue the shapes onto the wooden circles and you've got a fun, educational and inexpensive toy!


H really loves the toy! Right now, he focuses more on stacking and sorting the chips, but we have a lot of fun talking about the colors and shapes, so I know he'll be matching them up before we know it.


I even dressed up a plastic bag with some stickers and washi tape to store the game.


I spent $0.25 on each wooden circle and had all of the other supplies at home... not bad for less than $3!


Psst! I'd love to feature your latest project on tomorrow's Tuesdays at Ten June... send me your projects!

Little Lady June's Custom Vintage Inspired Nursery Quilt

It's official. I have a favorite item in Little June's nursery.


Meet LLJ's new custom quilt! It's vintage inspired, colorful, quirky, girly and fun... and I'm obsessed.

If you remember way back to 2012, David and I purchased a custom quilt for HDawg. We worked with the incredibly talented Kelly Hillis, who helped us choose each and every fabric individually and design the perfect little quilt for our boy. In addition to being used around his nursery, I used the quilt to take H's weekly and monthly first year baby photos so this blanket quickly became a huge part of HDawg's little life.

When we found out we were pregnant again, one of the first things I did (no joke) was contact Kelly and request a second quilt for the second bean! Of course, at the time, I requested a little boy quilt... oops. Sure enough, David, Kelly and I designed an adorable little boy quilt that coordinated with the second bean's aqua and brick red nursery color scheme.

Of course, we all know how this story goes! In mid January, David and I learned that our soon-to-arrive little boy was actually a little girl. Again, one of the first things I did was email Kelly with the subject line "EMERGENCY! IT'S A GIRL!" because I'm dramatic like that. Long story short, the amazing Kelly set aside the almost finished "boy" quilt and let us start fresh and design a "girl" quilt. The first quilt would have worked great for a girl, but I knew I wanted it to be more feminine for Little Lady June. So Kelly said let's start fresh. I know, I seriously love her. And the quilt!


The colors... the patterns... the detail... it's amazing. 

Oh and remember how HDawg's quilt had navy blue gingham backing? We echoed that sentiment by adding some sweet pink gingham backing to LLJ's quilt. Seriously, have I mentioned I love?


Needless to say, it's the perfect addition to June bug's nursery. So thank you, thank you Kelly!

And here's some awesome sauce news for someone out there... Kelly is selling the first quilt we designed in her shop! You can check out the listing right here. It's a seriously adorable quilt (obviously I love it since I helped design it!) that would be perfect in any little boy or girl room.


I hope this beautiful piece goes to a good home out there! To see more photos of this quilt or to check out her other quilts or custom listings, check out Kelly's amazing Etsy shop right here.

Okay, I'm off to stare at LLJ's quilt some more because I'm cool like that! ; )


Is There Such A Thing As Postnatal Nesting?

Guys, I have to admit, I'm feeling good. I've had a few crazy hormonal moments after the birth of Little Lady June (which reminds me, I still need to share her birth story with y'all!), but overall I'm really excited about starting life as a family of four.

I honestly think that a large part of my excitement is that I'm super relived to not be pregnant anymore. While I had a wonderful, healthy pregnancy, the false labor that lasted the last few weeks (including a contraction filled ice storm, a scary fall onto my belly while chasing HDawg around and three trips to the hospital prior to delivery) was really stressful. I was also dealing with the fact that my sweet little H was kind of frustrated with his momma and my lack of physical ability to play/take care/love on him as much. You can read more about my struggles with that here in a super sensitive post I wrote for BabyCenter. Oh yeah, and add to all of that that I was also as large as a house. Let's just say it was a long last month of pregnancy.

But, thankfully, our sweet little girl arrived happy and healthy. David and I look at each other and sigh "this is a dream come true!" multiple times each day. Two healthy, beautiful kiddos... you can't beat that.

So, like I said, I'm feeling good! I've got this rejuvenated spirit and I'm all excited about life. It's kind of like my new year- I'm ready to welcome spring along with a whole bunch of new fun things. A few goals and "to-do's" if you will. I know, that's kind of ambitious coming from a sleep-deprived mom of two under two! But it's the truth. What is wrong with me, I'm not sure... is there such a thing as postnatal nesting?!

I thought I'd keep myself accountable by sharing a few of these ambitious ideas and goals with y'all.

Plant a small vegetable garden on our back porch.

 via

Print out family and Instagram photos and/or make a family photo book.


Sew Little Lady June her own DIY burp cloths (like I sewed for HDawg!).


Start meal planning and cooking again.

 via

Clean out (sell and donate items) and organize our garage.

 via

Toss/donate my old clothes and update my wardrobe.


 Start running again, consistently.

 via

Pick back up on my weekly cleaning schedule.


And, of course, I have a million and ten fun little DIY decor projects on my brain, too. Follow me on Pinterest (@tenjuneblog) to see more of what ideas I'm loving these days.

So, it sounds like it may be a busy spring for me, right? I'll probably wake up tomorrow and say, ummmmm never mind, all I want to do today is nurse and watch Real Housewives. Hopefully this ambitious side of me sticks around!
Related Posts Plugin for WordPress, Blogger...