Favorite DIY Posts from 2013

Guys, thank you so, so much for your sweet support and kind words about my big news yesterday. It was a really huge, somewhat scary decision for David and I to make and it felt even scarier to actually share it with the world. Needless to say, you guys made me feel great about everything and I truly, truly appreciate that. I'm looking forward to 2014 and all of the big changes ahead of me!

Before I go too crazy tonight popping that grape juice bubbly and belting out a few stellar verses of "Auld Lang Syne,"  I thought it'd be fun to look back on some of my favorite DIY posts from 2013. Later this week, I'll share your favorite Ten June posts from the year. These just so happen to be some of my favorite do-it-yourself projects that I tackled throughout the two-oh-one-three.


I still can't say enough good things about that aquarium felt magnet board, it's one of my favorite DIY projects I've ever done! If you're looking for more ideas, check out my favorite 2012 DIY projects- there was a lot of good stuff going on that year, as well!

See you in 2014, friends! Happy New Year!

[More] Big News from the Ten June House


2013 has been a year full of big news for my family. 


...in September, I shared that we are pregnant with our second baby...

...later that month, I shared that we are having another little boy...

...and even later that month, I shared that we had sold (kind of) our old home and were moving to a new rental house....

Phew. I'm tired just reading all of that. That's a crazy busy year! Guess what? I've got one more piece of big news to share with you to cap off 2013. After much prayer, reflection and analyzing what's best for our family, I have decided to quit my full-time job and spend some time at home over the next few months.

Most of you know that I have a career practicing law. I'm a real estate attorney at a small firm outside of Atlanta. Ever since HDawg was born, I've been incredibly blessed to have a flexible, "part-time" schedule where I work approximately 30-35 hours a week both in the office and from home. This schedule worked great for me, as I felt like I had the best of both worlds getting to work but also to have a day or two at home each week with H. Unfortunately, I oftentimes have nighttime hearings that keep me out way past HDawg's bedtime (meaning there are some days I don't get to see him at all) and, as I'm sure you can imagine, an attorney's job can be quite stressful at times. Even in a great firm, it's simply a high-pressure job.

One of the scariest parts about the move to our current rental house back in October is that it put me about 70 miles away from my office. But it was worth it knowing that we were so much closer to David's office and HDawg's school; it was definitely time to move our lives closer to that. So we bit the bullet, made the move and I modified my schedule at that time so that I was only going into the office (ie. making that lengthy commute) twice a week. 

And then, all of a sudden, I was 7.5 months pregnant and really not enjoying that long drive, those late-night hearings and the general pressure of working a professional job. My doctor advised me to rest... and I looked at her and said, "like, when?" Rest just didn't happen for me. In between working, caring for my family, chasing after my adorable 15 month old and getting us settled after our move, I didn't have time to relax, focus on being pregnant or anything like that. I was living quite the chaotic life. I am sure that many (if not most!) of you can relate.

Of course, there are a bunch more personal factors that go into play here. For example, my sweet husband's completely rational fear that I will go into labor 70 miles away from home/him/our hospital and doctors. So, ultimately, David and I discussed and prayed about it, and we decided that the best fit for our family was for me to leave my current job at the law firm at the end of the year. In fact, today is my last day!

I absolutely intend to go back to work after my maternity leave. I am due March 2nd, but I had H about ten days early, so I expect to deliver sometime in mid-February. A three month maternity leave takes me to mid-May. At that point, I plan to go back to work full-time somewhere closer to our new home. I will spend some of my maternity leave focusing on that job search and finding a new fit for my professional life. As much as it is bittersweet to leave my current firm (that I've been at for five years as an attorney and two more before that as an intern!) it's also very exciting. I can't wait to see what's ahead for me in terms of my professional life and the opportunities for growth I'll have there.

Until then, I have about six to eight weeks until baby #2 makes his appearance. That will give me a lot of time to spend loving on HDawg, focusing on our family of three (for now!), preparing our home for our new family member, focusing on my freelance writing (I currently write for BabyCenter, ForRent and Houzz- check out my articles!) and, maybe... just maybe... time to take a nap or two! : ) And then, of course, come March, I'll have plenty of time to welcome our sweet new baby boy into the world and help my family make the transition to a family of four.

So, that's what is going on with my family lately. 2013 has been a pretty exciting year of transition for us and I think that 2014 will be just as exciting and filled with so many new adventures! I can't wait to see what lies ahead in our little lives. Thanks so much for following along with our crazy adventures.

Stay tuned, I'll be rounding up my favorite 2013 projects and posts later this week!

Merry Christmas!


Santa: HO! HO! HO!
HDawg: I'm sorry, who are you again?
 
Friends, I truly wish you a merry, merry Christmas. I am feeling exceptionally blessed this year. I'm madly in love with the two boys in my life and can't even believe that God has blessed us with another little boy on the way. I cannot believe this little bambino will be here in a couple of months! Seriously, though, just watching my boys play on the living room floor brings tears to my eyes these days. I'm just so happy! A lot of good things are happening to our little family and I have the good man upstairs to thank for that. 2014 is going to be a good one. I'm so excited to celebrate Him, His Son and all of the goodness that He brings to all of our lives every day. What a wonderful season!

I'm signing off for the rest of the week (I may pop back in if I eat enough Christmas sweets to give me a sugar rush of energy to throw up a blog post!) to enjoy those scrumptious boys of mine and all of my family's fun holiday traditions. I wish you and your families a merry Christmas! I hope you have a great week!

My Family's 2013 Christmas Card


Merry Christmas from the Ten June crew! 

This year, David and I opted to have our family picture drawn for our Christmas cards instead of using a traditional photo. I enlisted the help of My Little Buffalo who helped capture our little family. I think it turned out so cute! I used the family photo sketch on one of Minted's amazing gold-foil holiday cards they introduced this year. I'm seriously smitten!

Merry Christmas from my family to yours!

For a blast to the past, check out our 2012 Christmas card (hint: there was a naked baby involved!) and our 2011 Christmas post card.

Help! I Need Nursery Glider Advice

Hi friends! In between Christmas baking and holiday festivities, we're finally underway with baby #2's nursery! In case you missed it, check out this little guy's nursery plans here.

Earlier this week, we finally bought a crib... hootie hoo! We've also picked out and ordered the wall paint and have a few other details started, as well. It's about time! This baby will make his appearance in the next eight or so weeks! I know, crazy pants.

But, my friends, we've run across a roadblock. 


The dang glider.

When David and I were planning HDawg's nursery, we decided to splurge and get a Pottery Barn glider. And, honestly, it's been worth every penny. When H was an infant, we spent maaaanay hours in the chair, nursing and rocking him to sleep. Even now, the chair is large enough where we can snuggle up with H next to us to read books, rock him before bedtime (we generally lay him down awake at night, but spend a few minutes rocking and singing to him before he lays down) and hold him in the middle of the night when he doesn't feel well. It's seriously great. 

Part of our decision to splurge on this piece was that we could use it for other kids down the road. And then we decided to have another baby like two minutes later. What do you do when you have two babies?! Do we pass on the glider to the new baby? How would we rock H at night? Where would we read him books? I think we're leaning towards letting H keep his glider and doing something new for baby #2. But we're not ready to spend an arm and a leg! Especially on a piece of furniture that we won't have any need for in a few years. So this is where I need your help. What should we do? Here are a few of our options.


Go cheap. Just grab the least expensive option like one of these wooden gliders. This is clearly the best bang for our buck, but I honestly am so spoiled by the comfortable PB glider that I feel I will be so uncomfortable in this chair. And the last thing you want in the middle of a late-night nursing session is to be uncomfortable. But, this would easily keep us under a $200 budget.


DIY a chair. There are some incredible DIY glider tutorials out there. Most start with a basic $200 Ikea chair and then you add on the parts of an old recliner/rocker. I've tested the Ektorp and it's... eh. Plus there's the hassle of purchasing not only one, but two chairs, and then assembling the glider based on the do-it-yourself tutorials. I feel like this could be a $300-$350 process?


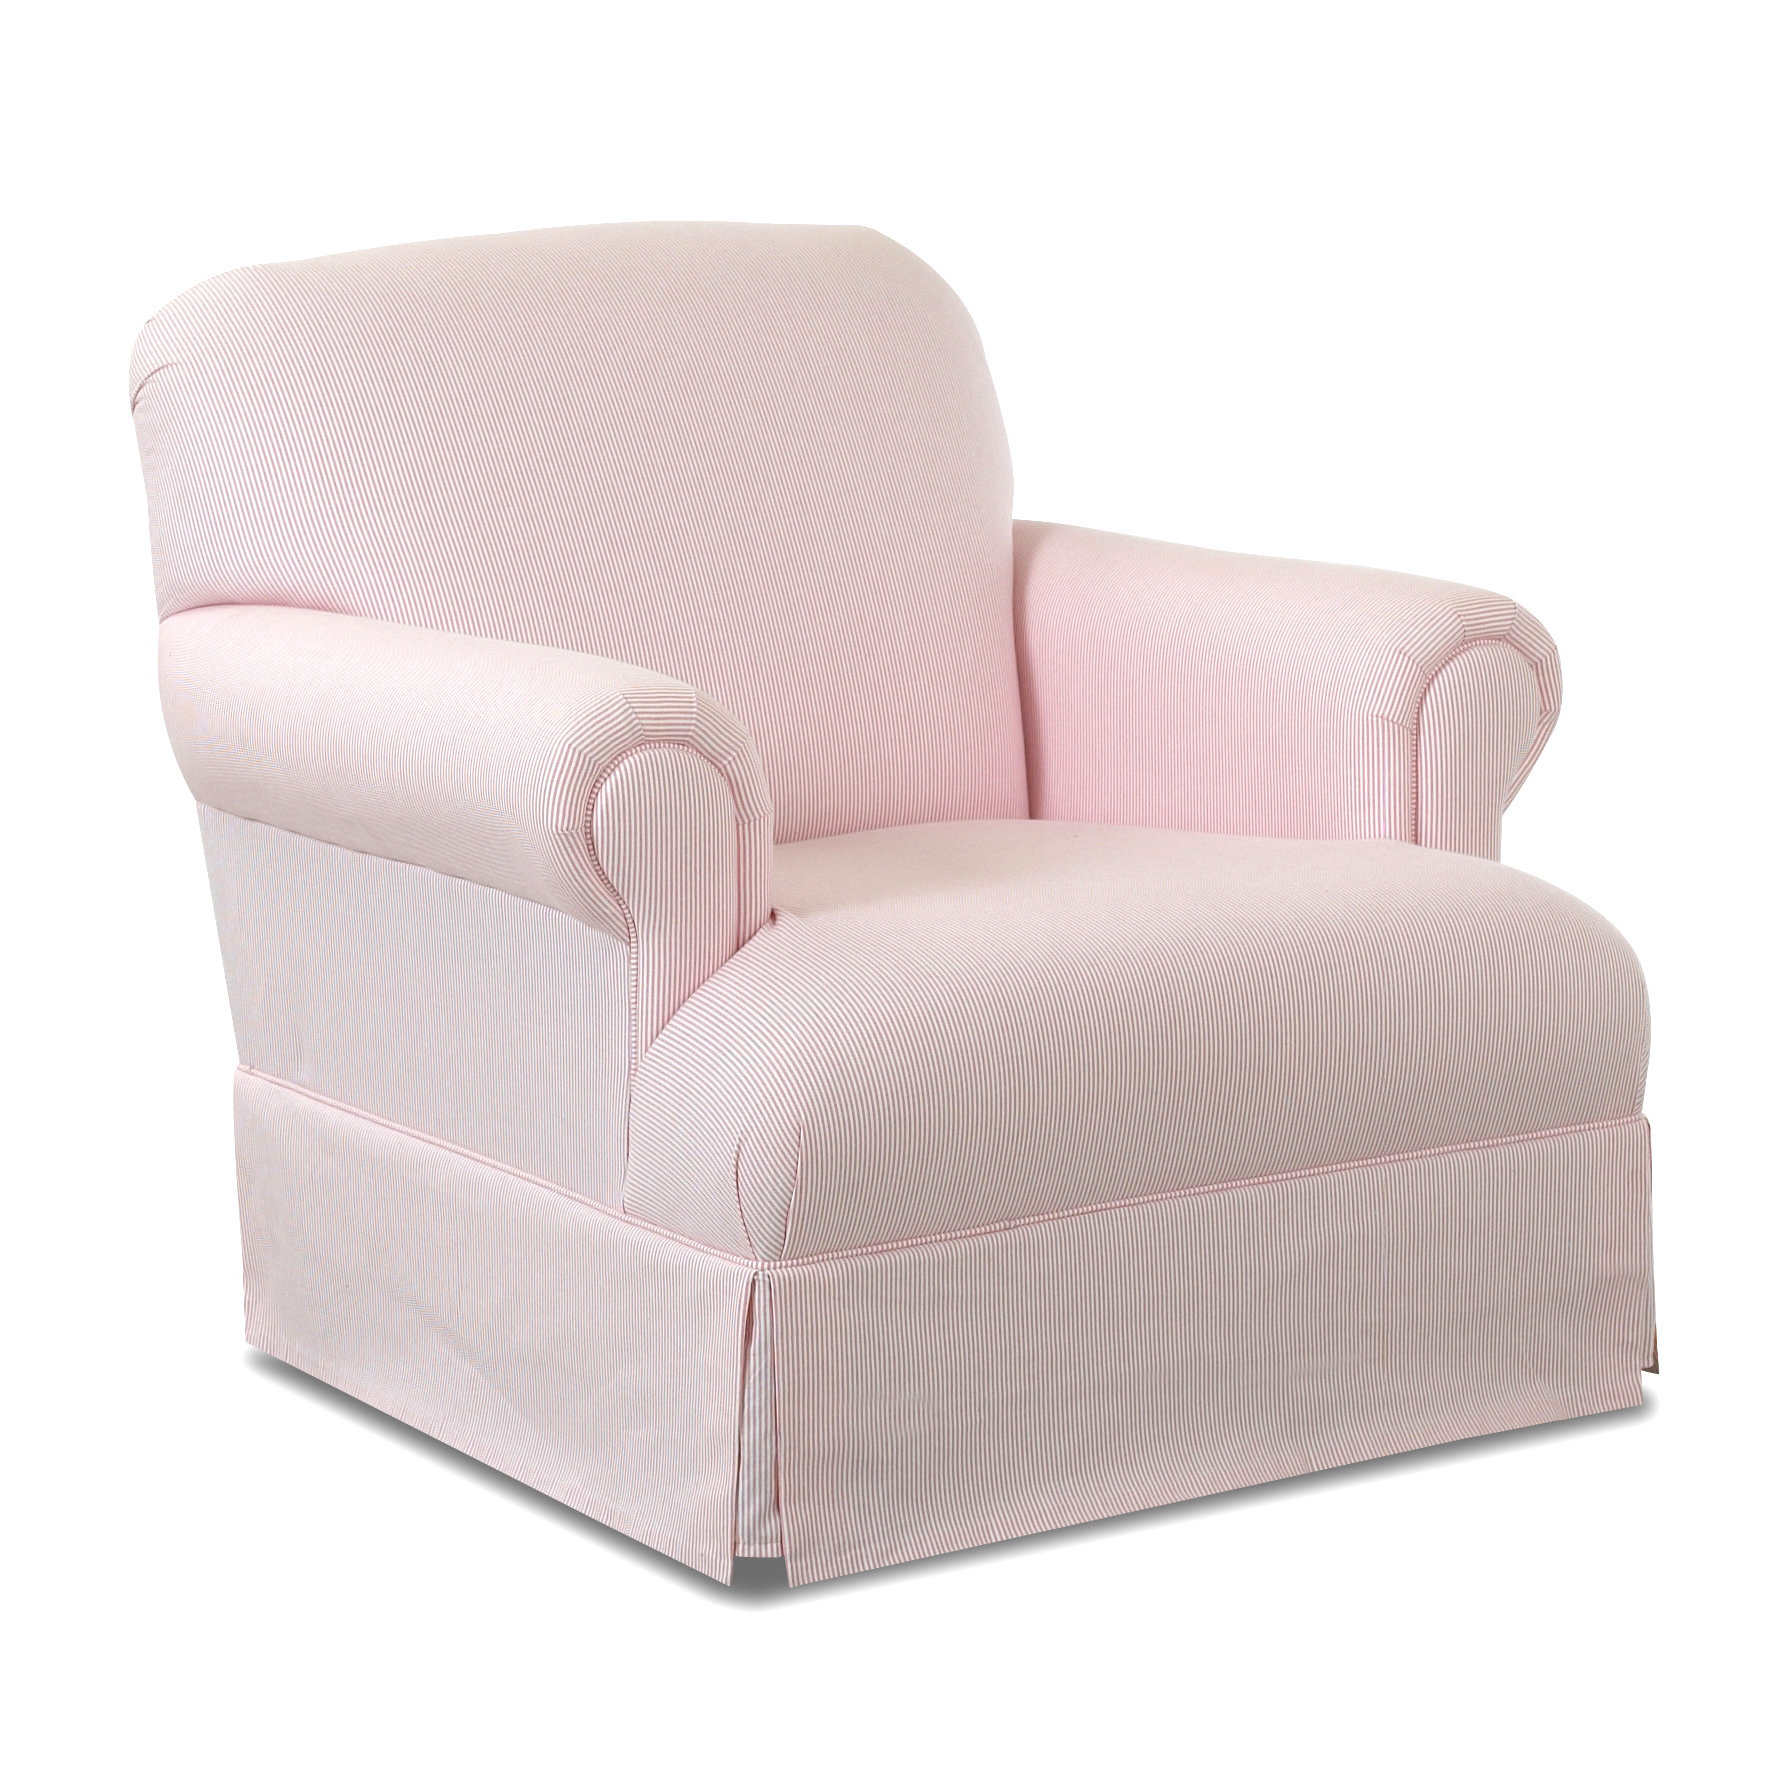
Bite the bullet and buy another nice glider. We can't afford another PB version, but what if we bought something like this (obviously not in pink)? It looks very comfortable and priced pretty reasonably. But we'd still probably be out somewhere in the neighborhood of $400-$500.


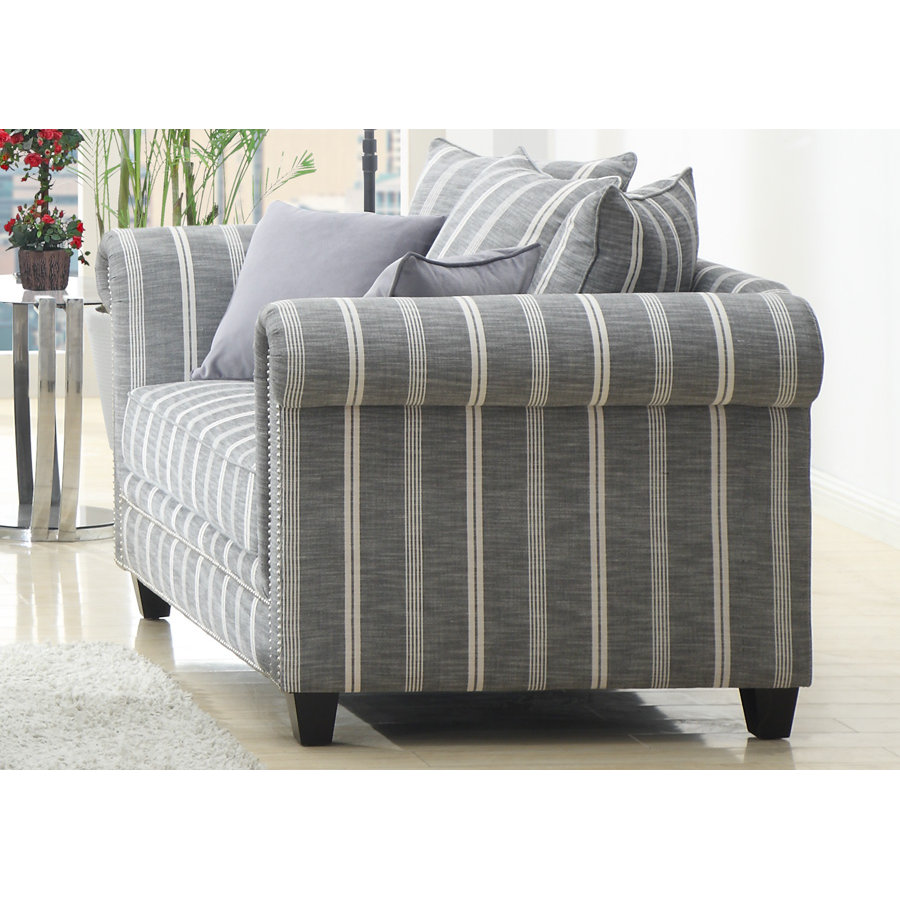
Buy a loveseat for HDawg's room. And then, of course, put the PB glider in baby #2's room. This would give our family a place to sit in H's room, which is large enough that we've also designated it the main play room in our house. Family reading sessions on the love seat? I like! Another plus about this option is that the piece would be more versatile to use around the house down the road. But, we lose the rocking element. Although maybe some of you seasoned moms out there think that H will outgrow the rocking soon? Another negative is that this option will run us somewhere in the neighborhood of $500ish.

David's not too keen on thrifting a glider... I know what kind of gross stuff has been spit up on our glider (which, thankfully, we can wash because it's slip covered) and it makes us a little hesitant to have a used piece for our little bambinos to cuddle up into. 

Okay, so what do you think? WHY can't I have my cake glider and eat it too?! Any other options that you can think of that we're missing? HELP!

Blogger Kiddo Christmas Gift Exchange


This holiday season, I was invited to do a blogger kiddo Christmas gift exchange! How fun, right? We were randomly paired up with another blogger and got to play secret Santa for our kids.

We received an adorable gift from Sara and Mac at Running from the Law. It's a pig-shaped piggy bank and, let me tell you, HDawg is obsessed. It has quickly become his favorite toy! My favorite part is when he tries to "oink" and it kind of comes out like he's trying to hock something from his throat. Priceless.


I mean, he literally loves it so much that he squeals and laughs in delight while he's playing with it. So cute.


HDawg and I played secret Santa to Julie and Hudson at The Girl in the Red Shoes. Head over to her blog to see what we picked out for them!

Check out all of the awesome bloggers who participated:

Erinn at Strawberry Swing and Other Things
Natasha at Schue Love
Michelle at Ten June
Jessica at Little Baby Garvin
Veronika at Veronika's Blushing
Erin at Hello Erin
Emily at Dear Owen
Colleen at Meet the Sullivans
Natasha at Hello Happiness
Sara at Running from the Law

If you're looking for more baby gift ideas, I wrote a post over on BabyCenter filled with my favorite toddler Christmas, holiday or birthday gift ideas. It's seriously the ultimate toddler gift guide! Check it out right here.

Santa Hat Bugles + Sugar Cookie Chex Mix Christmas Recipe


Hands down, one of my favorite things about the holiday season is the food. Is that superficial? Maybe, but momma loves her some sweets. And, while it's certainly not a license to cram 29 sugar cookies in my mouth at one time, this pregnant momma just passed my 28 week gestational diabetes test! If you remember, I had gestational diabetes during my pregnancy with HDawg, so it's really great that my body is responding properly this time around. You can read more about the GD here and here. Anyways, it's time to celebrate with some Christmas sugar, that's for sure.

Let's start with an ah-maz-ing party mix recipe!

Step one is to create the adorable Santa hat Bugle snacks. I saw these little guys somewhere a couple of years ago and have been pining to recreate them for the last couple of Christmas seasons. Well, this is finally the year!


I melted red candy discs (which you can get at your grocer or craft store) and simply dipped each individual Bugle snack into the melted candy. It took me awhile to get the hang of where to hold each piece as I dipped it, but I resolved to simply get messy and held each piece at the top point. Then I dipped the bottom of each hat in tiny white sprinkles. Here's my set up.


Place each wet hat on a piece of wax paper to dry. Once dry, pop a mini marshmellow on the top of each Bugle to complete the Santa hat look.


So cute, right?!


As for the rest of the party mix, I borrowed a recipe for a sugar cookie mix from the great folks over at Chex. I tweaked a few small things, though, so here's the process I followed.

Ingredients:

-6 cups Rice Chex cereal 
-1/4 cup butter
-1/4 cup sugar
-2 tablespoons corn syrup
-2 teaspoons pure vanilla
-1/4 cup powdered sugar
-1/4 cup white chocolate chips
-Christmas colored M&M's
-Santa hat Bugles (recipe above)

Directions:

1. Microwave butter until melted. Add sugar and corn syrup; microwave for thirty seconds until mixture is melted and can be stirred smoothly. Add vanilla to mixture. In a separate bowl, pour mix over cereal and stir until evenly coated.

2. Microwave entire mixture for two minutes. Sprinkle with powdered sugar and mix. Spread entire mixture on wax paper to dry.

3. Melt white chocolate chips in microwave. Pour over cooling Chex mix.


4. Once cooled/dried, add the mix to a bowl and add M&M's and Santa hat Bugles.

And now it's time to paaaarrty! And eat. Yum.


It's also time to share your holiday recipes (food or cocktails!) with my girls Natasha and Heather!


Make sure you head over to their blogs for some amazing Christmas recipe inspiration!


Jezebel Belle


I'm not typically one to toot my own horn, but I am really proud of a recent feature I had and wanted to share! Jezebel magazine recently named me one of Atlanta's fiercest interior design bloggers! And, to make matters even more exciting, I was featured among two other amazing gals- my sweet friend Erika Ward from BluLabel Bungalow and a new blogging friend, Heather Metzler from Southern State of Mind. These Atlanta girls are amazing, be sure to check them out.

You can click on the image to zoom in and read the article.

Jezebel is an Atlanta based publication that I've been reading forever, so this is a huge thrill for me. Unfortunately, there was a snafu in the print edition and mine and Heather's info was switched which means poor Heather has my photo next to her info and, therefore, looks six months preggo! Oops. It's still pretty exciting though and I truly appreciate the opportunity.

Okay, enough about me. How's your week going? Have you finished your Christmas shopping? Enjoying all of the fun Christmas activities?!

Why, Hello New Dining Room Benches


Remember that one time I told y'all we got a new dining room table and planned to get new chairs soon? Um, yeah. That was three years ago. I clearly have commitment issues when it comes to big spending purchases. But, many moons later, we finally pulled the trigger on some dining room seating.

Our dining room table is from World Market. At first, I planned to use some collected, white-painted stores from the thrift store with the dining table. Even back at our old house... like, two houses ago... we ended up using this collection around our kitchen table, though. We needed the chairs in the kitchen and also needed chairs in the dining room. Even though that's a lot of seating, we eventually realized that we just needed to buy some new chairs for the dining table. 

World Market sells matching wooden chairs, but I always envisioned some pretty upholstered beauties. I did splurge (ha) on some upholstered Parsons-style chairs from Habitat for Humanity that I fixed up and shared with you here. I liked these two chairs but, of course, two chairs isn't going to cut it around a big ol' dining room table.

Over the past couple of years, I never could find upholstered chairs that I really liked without spending what felt like millions of dollars. So I started shopping benches. They're such a cheap but character-friendly version of dining room seating. I finally settled on a favorite- the benches that match our dining table from World Market. I'm not typically one for matchy sets, but I actually really like the mix of the two upholstered Parsons chairs with the wooden benches. And how cute would the benches be with some pretty throw pillows mixed in for texture and color? I'm digging it. And then, on Cyber Monday, World Market had a big sale and free shipping, so I finally pulled the trigger.


 The benches will easily seat three people each, bringing our total seating count to eight. Woo-hoo! That's a pretty big improvement from two, especially just from the addition of two benches. From what we can tell so far, the quality of the benches is just as good as the table, which has impressed us greatly over the past three years. Even this little guy approves.


As you can see, we have a long way to go in our dining room right now. It was the central location for us to unpack boxes and for me to manage all my decor junk as I set it up. There are still boxes everywhere! But, because I am legit crazy, I'm working on a little makeover of the room before we host my family on Christmas day. Yes, yes, I'm all... heyyyy, I'm seven months pregnant and working on a nursery and unpacking and all that good stuff, so let me randomly throw in a dining room makeover, too! Yeah? Why not? You only live once : ) DINING ROOM YOLO!


Hopefully I'll have some updated dining room shots to share with you soon!

Forgot what our old dining room used to look like with this table? Here ya go! Sigh, I miss it, too. For more about this room, check out this page.


Red + Silver + Gold Christmas Tree


This year, I decided to take it easy on our Christmas tree. Even though we set up the tree (which, by the way, is a fakesies) in our office (ie. not in the living room and farther away from HDawg's main play space!), it's still a room that H ventures into. So the tree needed to be toddler proof.

And, the more I thought about setting up a tree at 7 months pregnant, the more I realized I be taking all of this down at 8 months pregnant... so simple definitely won the battle this year!

I used the red and white pom pom tree skirt that I picked up from Hobby Lobby a few years ago.
 

While I didn't tie in any rustic elements, I did maintain the red + silver + gold color scheme from this year's Christmas mantel [Psst! You can still link up your mantels through Christmas day!] Most of the ornaments are simple shatter-proof balls, but I also threw in a few fun ornaments like the cardinals (which are special to me and David because cardinals were the mascot at our elementary school!), acorns, DIY frosted cranberry ornaments and sparkly drums. No fancy garlands for us this year!


The tree (which is new to us this year, from Home Depot) almost reaches the ceiling, so we didn't have room for a true star or angel tree topper. Instead, I placed this glowing gold bow up at the top.


Even though the tree is pretty simple this year, I love it. And that's mainly because HDawg loves it. He helped us decorate the lower sections... and you can bet that I didn't touch all of the clustered ornaments he put together. They're priceless! He absolutely loves the Christmas lights, too. I videoed him watching us turn on some lights around our stair bannister the other night... I'm telling you, this kid loves himself some Christmas lights!


Needless to say, we spend a lot of time laying on the floor, looking up at the tree in awe.


 For those of you wondering what the rest of my office looks like right now, here ya go. Messy desk on the left, messy craft area on the right. One day I'll get this room together!


Want to see some of my trees of Christmas past?


Also, if you're looking for more baby and toddler proofing ideas for your house this holiday season, check out this post that I recently wrote over on BabyCenter!

Now it's time for you to link up your Christmas tree with Courtney and Megan!


Hot Momma Fashion: 12 Days of Maternity Holiday Style

It's been awhile since I've posted a Hot Momma Fashion post! Maybe it's had something to do with the fact that my rapidly growing belly hasn't exactly inspired me to work with any fun fashion trends. 

Until now. 

Oh yeah, peeps. Get ready for some inspired holiday fashion. In fact, twelve days of it! In an act that feels kind of like Santa dropping a huge bundle of presents down my chimney, Target reached out to me and asked if I wanted to learn more about their Liz Lange maternity collection. They've got a ton of new great items, from casual to dress wear.

I plan to share some of the collection items over the next twelve days on my Instagram feed. If you're not following me already, you can find me at @tenjuneblog. I'll be posting fun outfits on IG over the next twelve days... for Christmas work events, for running last-minute holiday shopping errands, you name it, I'm wearing it. With a gigantic baby bump. I'll post with the hash tag #12daysoflizlange.

And even if you aren't preggers, follow along for some fun outfit ideas. Y'all know I'm not a crazy fashionista or anything- I like to keep my fashion ideas real and down to earth, so hopefully my ideas are helpful to everyone!

Here's a sneak peek of today's first post.

t-shirt, sweater and skinny jeans, Liz Lange for Target
ballet flats, Old Navy

Head over to Instagram for more! You might get lucky and spot a few 28 week bump shots, as well : )

Psst! I announced the winner of the $75 Uncommon Goods gift card giveaway right here. Was it you?

DIY Holiday Pinwheel Garland Craft


 As you guys know, we decorated for Christmas twice this year around my casa. Recently, we set up our seasonal red + silver + gold decor but back in October, I decorated the house for the Home Depot holiday style challenge. Double dose of ho, ho, ho, I tell you.

For that challenge, I used a few non-traditional colors, like turquoise, purple and lime green. One fun piece I decided to incorporate is this do-it-yourself pinwheel garland. The garland can be hung across your fireplace mantel, down a stairway banister or along your wall… the possibilities are endless! 

What you need:
-scrapbook paper
-hot glue gun
-large width ribbon
-small width ribbon
-decorative accessories 


Step 1. Cut and fold your paper into a pinwheel.

Cut your scrapbook paper into strips of varying widths. I chose a few widths that were approximately two, four and six inches wide. Fold each of these strips like an accordion. Make sure you cut two strips of each paper width. 


Next, take your accordion strips and fold them in half, as pictured. Hot glue the middle fold of your strip together so the accordion forms a seamless half circle. Then match the two similar width half circle pieces together and hot glue the bottoms of each half circle together to form a whole circle. 

Step 2. String the pinwheels onto a garland.


You should have a gap where one of the folds rests in the middle of your pinwheel circle. Spread this gap apart and hot glue a piece of small, thin ribbon between the folds. Glue each pinwheel to the same ribbon, creating a garland.

For some extra sparkle and support, I hot glued the back of each pinwheel to a strip of larger thickness ribbon. You can easily skip this step, though, and use the thinner ribbon as your supporting garland ribbon. 

Step 3. Decorate your pinwheels.


I used some pretty fun scrapbook paper, like the patterned lime green chevron, polka dots and glitter sheets, so I didn’t have much decorating to do with my pinwheels. I did add a small glittery snowflake sparkle sticker to the center of each pinwheel, just for some added pop.

And that, my friends, is it! You’ve got yourself a decorative holiday pinwheel garland!


I love hanging my sparkling version up on the wall next to the lights of the Christmas tree. It all looks so festive and fun! 


I'm linking up with Michaela and Cassie today and their craft link party! Who's with me?

Related Posts Plugin for WordPress, Blogger...